How to Print a Large Poster on A4 Paper on Mac
If you want to print a large poster, infographic, or oversized image using regular A4 paper on a Mac, you'll quickly run into size and scaling issues. This guide shows you how to print large posters across multiple A4 pages on macOS — with correct alignment and no missing edges.
In This Guide
The Problem: Your Image Is Too Big for One Page
You have a high-resolution image - maybe a poster design, a detailed map, an architectural blueprint, or a beautiful photo you want to display. The image looks great on screen, but when you try to print it on your regular A4 printer, you face a dilemma:
- Shrink to fit: The image becomes too small to see details
- Print at actual size: Only a portion of the image prints, cutting off the rest
- Scale up: Your printer doesn't support paper larger than A4/Letter
What you actually want is to split the large image across multiple A4 pages that you can tape together to create the full-size poster. This is called tile printing or poster printing.
What Doesn't Work (Common Mistakes)
Using macOS Preview
Many users try to print large posters using macOS Preview, but it has no tile printing feature. Preview will either shrink your image to fit one page or crop it. There's no option to split across multiple pages.
Using Microsoft Word or Pages
Microsoft Word and Apple Pages are often used for poster printing on Mac, however this approach has serious limitations:
- Extremely time-consuming manual cropping
- Prone to alignment errors between pages
- Difficult to get consistent page breaks
Using Online Tools
Online poster splitters and image tiling websites exist, but they require uploading your images to third-party servers. This raises privacy concerns, especially for personal photos or confidential documents.
The Solution: PrintTiler for Mac
PrintTiler is a native macOS app designed specifically for tiled poster printing. Compared to Preview, Word, or online tools, PrintTiler is built from the ground up to solve this exact problem on macOS.
- Automatically splits your image into perfectly aligned pages
- Shows you a real-time preview of how pages will be divided
- Works completely offline — your images never leave your Mac
- Supports multiple paper sizes (A4, Letter, A3, and more)
- Lets you choose scaling options to control the final poster size
How to Make a Poster on Mac Using Multiple Pages
The easiest way to create a poster on Mac is to split your image across multiple printable pages using PrintTiler. Follow the steps below to get started.
Step-by-Step: Print a Large Poster on A4
Open PrintTiler and Select Your Image
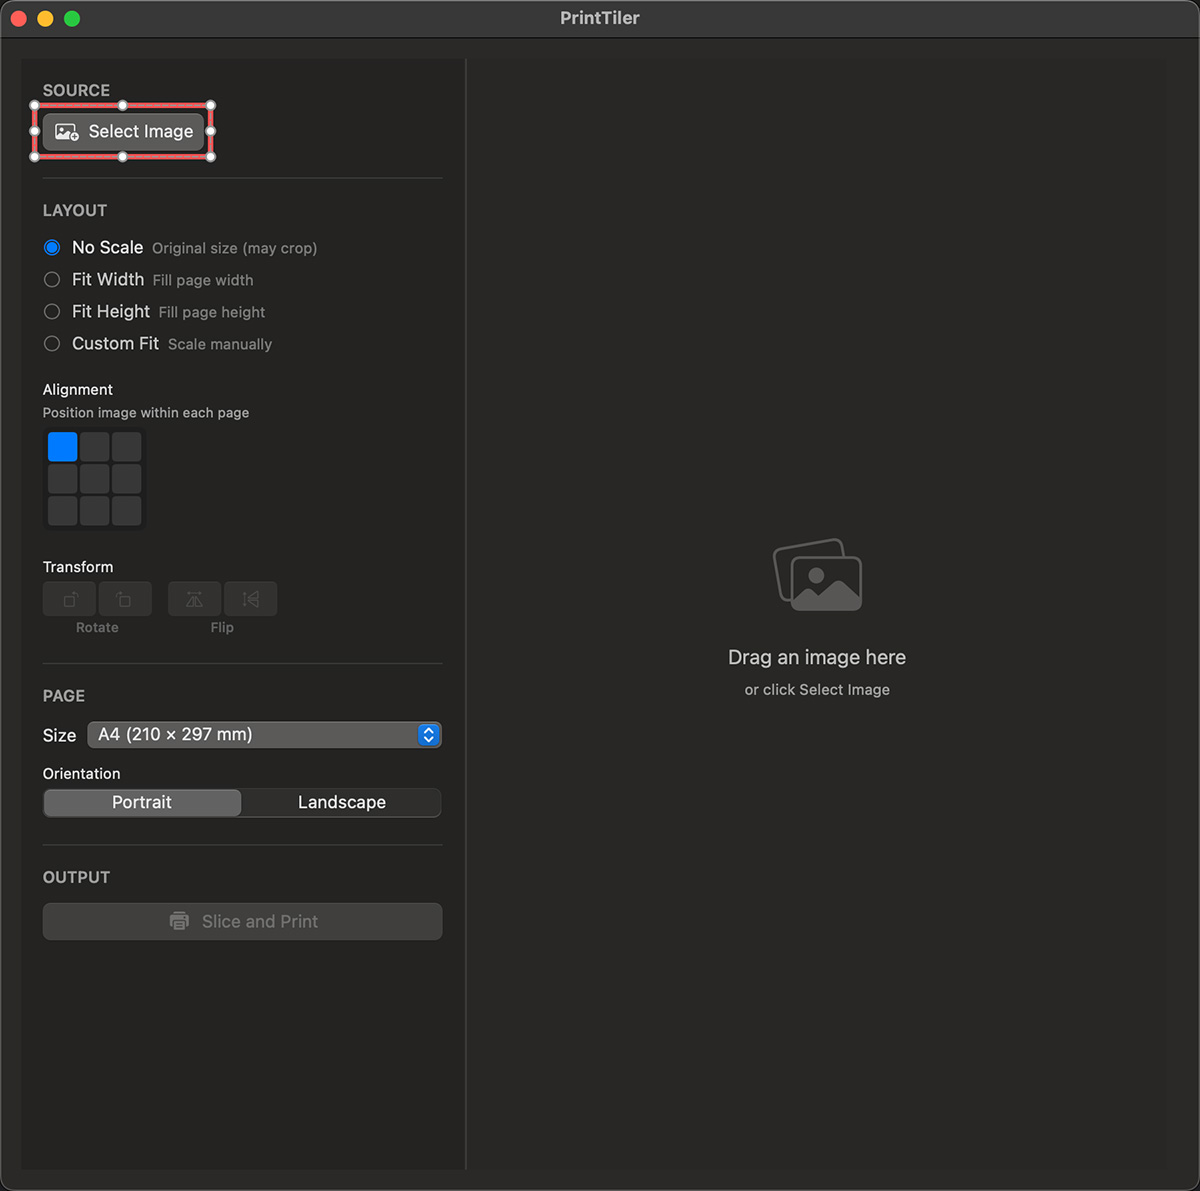
Launch PrintTiler from your Applications folder. Click "Select Image" or drag and drop your image file directly into the app window.
Supported formats: PNG, JPEG, TIFF, and other common image formats.
Choose Your Paper Size
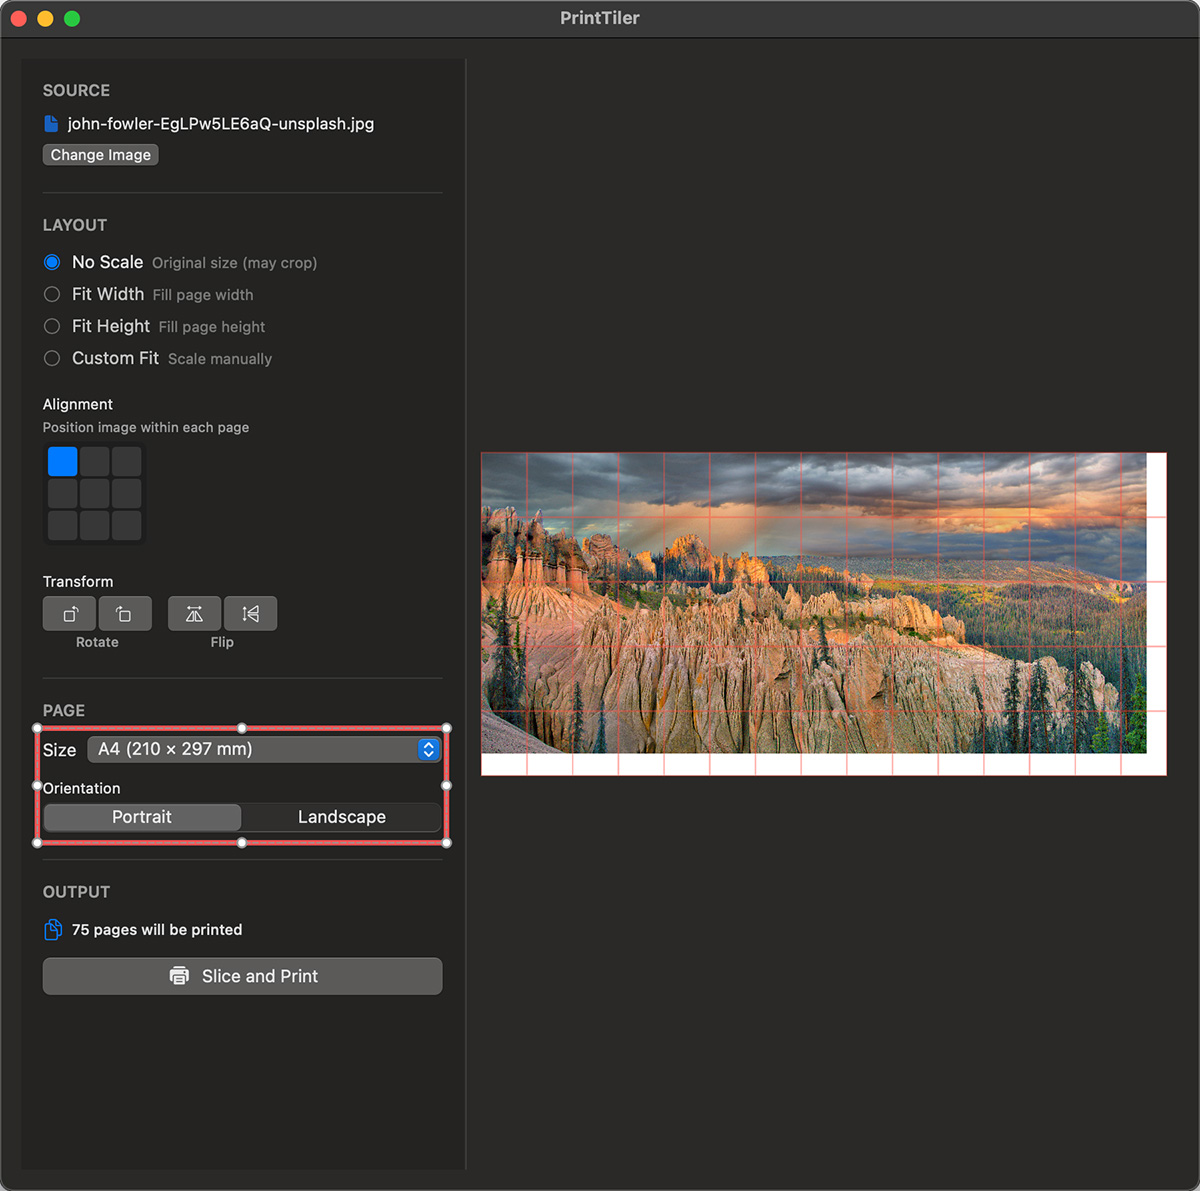
In the Page section on the left panel, select your paper size from the dropdown. For this guide, we'll use A4.
Also choose the Orientation - Portrait or Landscape - depending on your image shape.
Select a Fit Mode
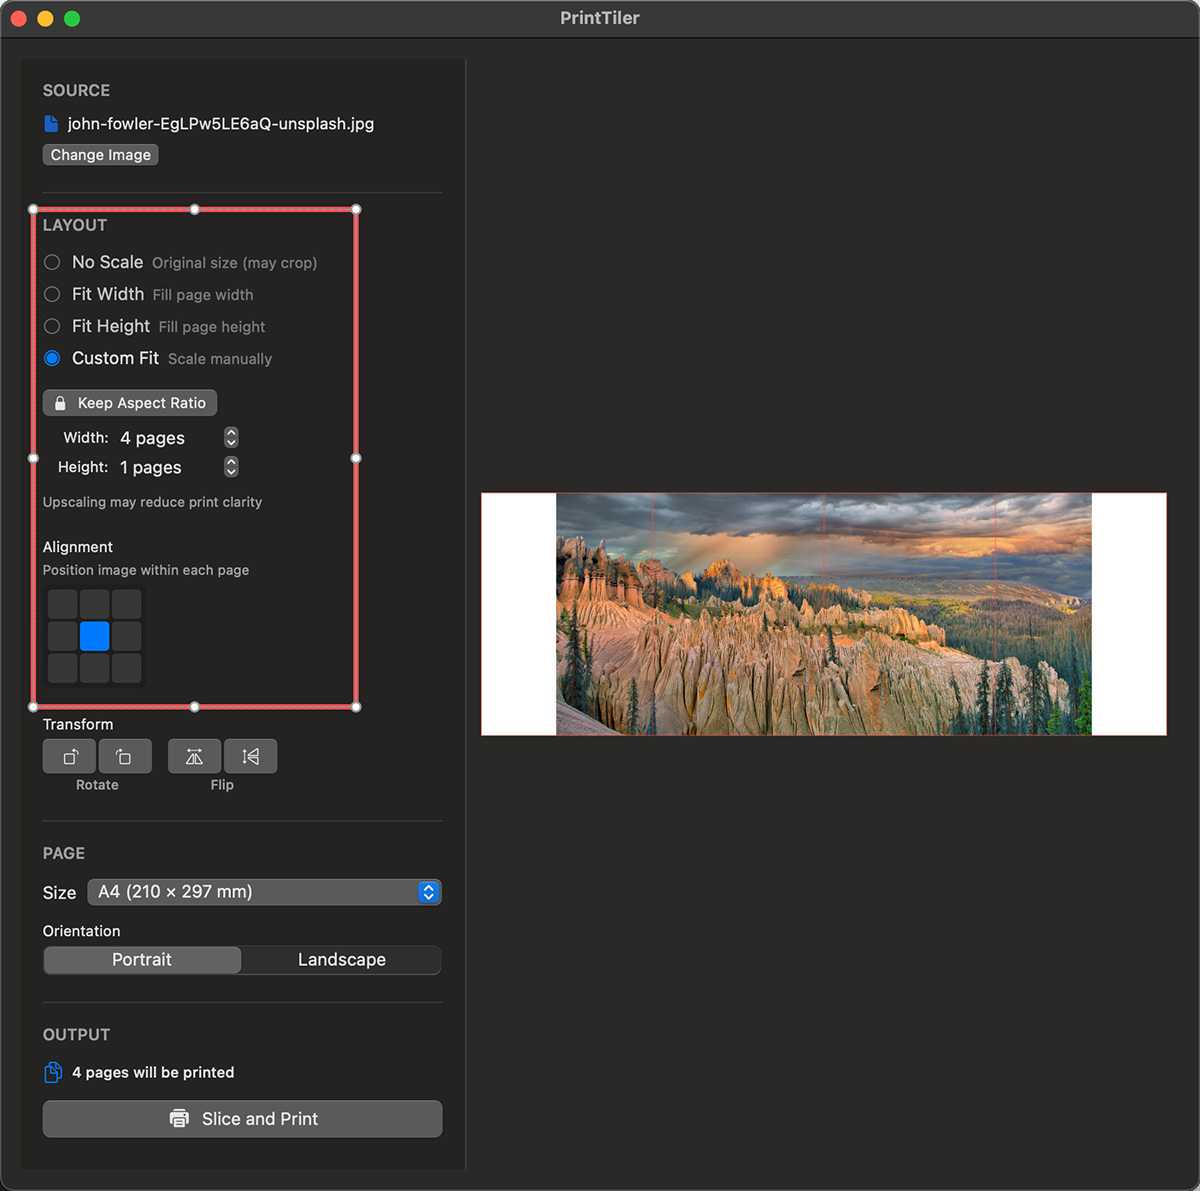
The Layout section offers four fit modes:
- No Scale: Keeps the image at its original DPI. Best for images designed at specific print sizes.
- Fit Width: Scales the image so its width matches exactly one page width. Height spans multiple pages.
- Fit Height: Scales the image so its height matches exactly one page height. Width spans multiple pages.
- Custom Fit: Manually specify how many pages wide and tall you want your poster to be.
For most posters: Use "Fit Width" or "Custom Fit" to control the final size.
Preview the Page Split
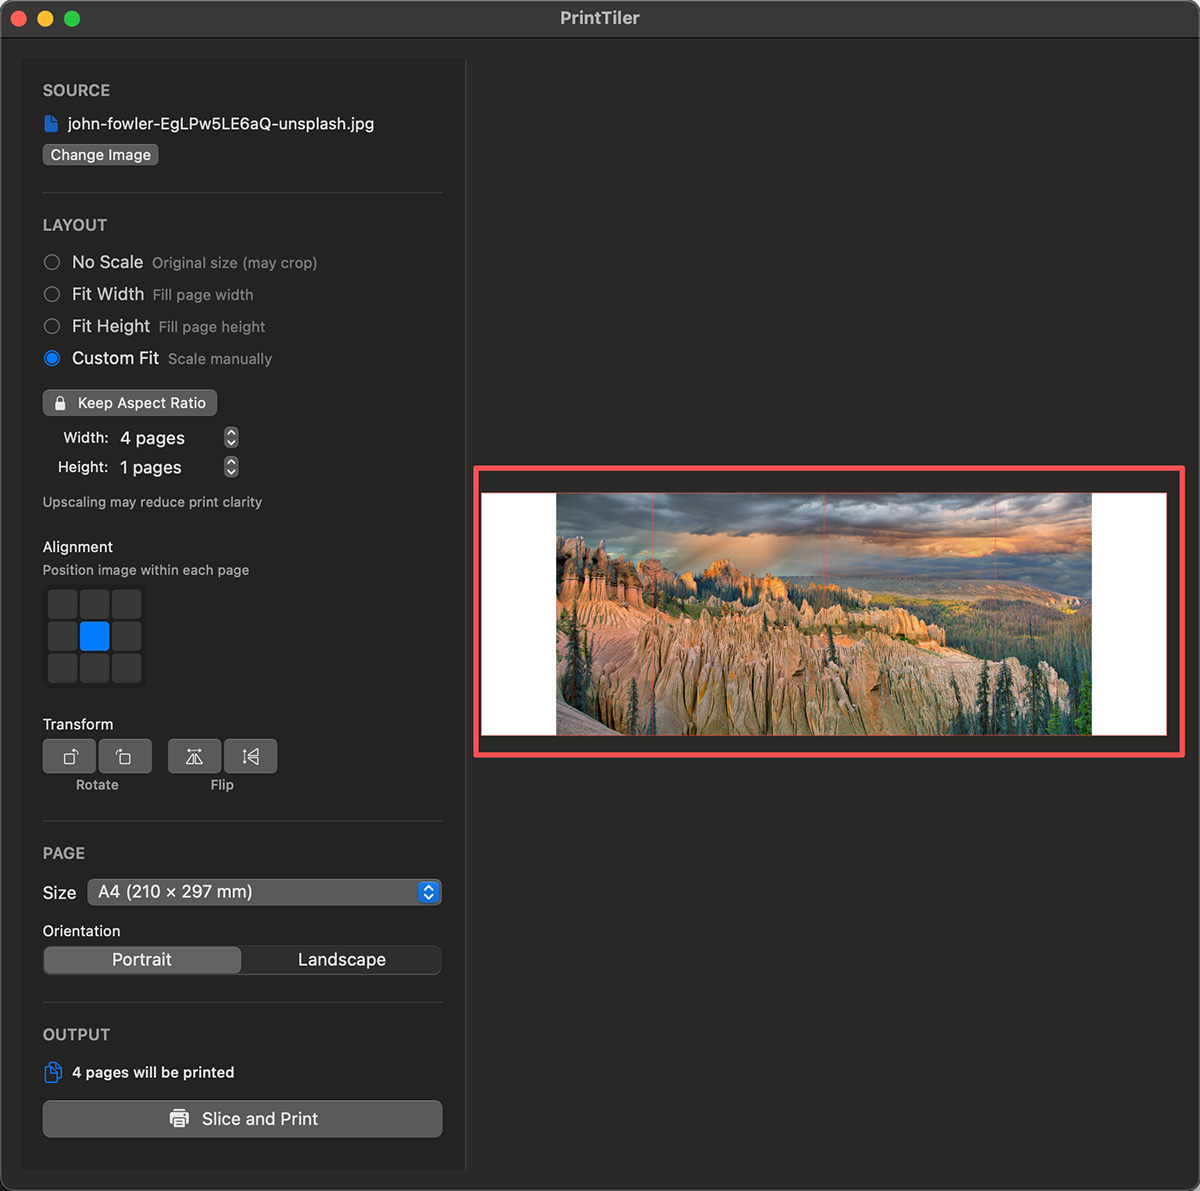
The right panel shows a real-time preview of your image with red grid lines indicating where the page splits will occur.
The Output section on the left shows exactly how many pages will be printed (e.g., "4 pages to print").
Adjust your fit mode or use Custom Fit to change the number of pages until you're satisfied with the layout.
Click "Slice and Print"
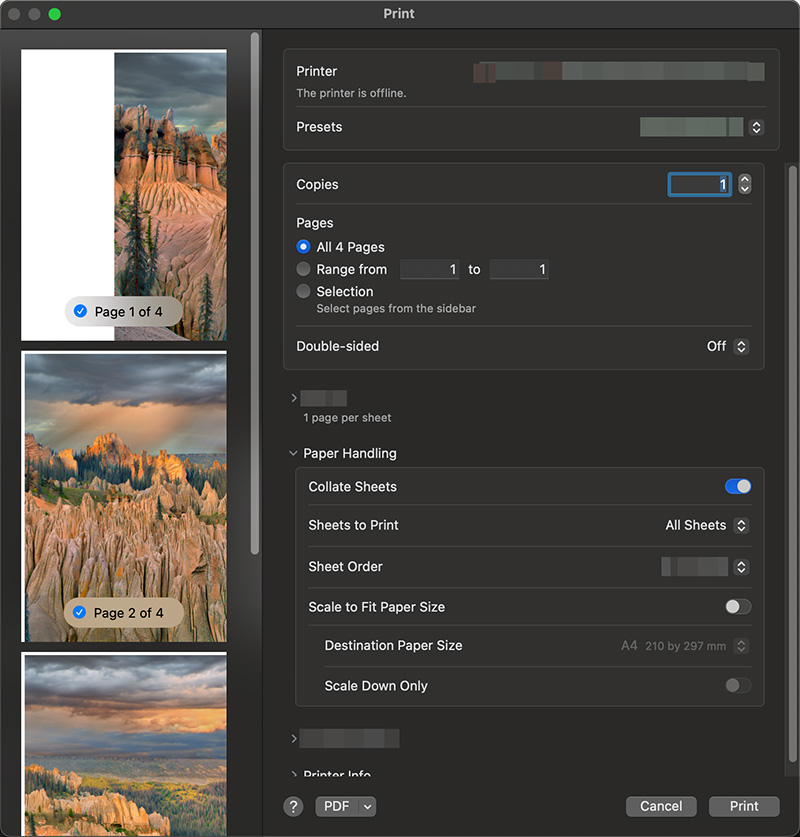
Once you're happy with the preview, click the "Slice and Print" button. This opens the standard macOS print dialog.
Make sure your printer settings match:
- Paper size: A4 (or your chosen size)
- Orientation: Match what you selected in PrintTiler
- Scale: 100% (do not scale to fit)
Assemble Your Poster
Collect your printed pages and arrange them in order. Trim the white margins if needed, then tape or glue the pages together from the back.
Tip: For a cleaner look, use PrintTiler's overlap feature to add duplicate content at page boundaries, making alignment easier and hiding seams.
Pro Tips for Best Results
Use High-Resolution Images
For sharp prints, use images with at least 150-300 DPI at the final printed size. Low-resolution images will look pixelated when enlarged. See our resolution settings guide for more details.
Adjust Alignment for Asymmetric Images
Use the Alignment grid to position your image within the page grid. For example, if your image doesn't fill all pages evenly, you can center it or align it to a corner.
Use Custom Fit for Specific Sizes
Want an A2 poster from A4 pages? An A2 sheet is exactly 2x A4 pages in each direction, so set Custom Fit to 2 pages wide by 2 pages tall.
- A2 from A4: 2 x 2 = 4 pages
- A1 from A4: 4 x 2 = 8 pages
- A0 from A4: 4 x 4 = 16 pages
Rotate or Flip if Needed
Use the Transform controls to rotate (90 left/right) or flip (horizontal/vertical) your image before printing.
Common Questions
Can I print on Letter size paper instead of A4?
Yes! PrintTiler supports Letter, Legal, Tabloid, and many other paper sizes. Simply select your paper size from the dropdown menu.
Does PrintTiler work with PDF files?
Yes! PrintTiler now supports PDF files directly. See our guide on printing large PDFs across multiple pages for details on how PDF handling differs from images.
How do I avoid white borders between pages?
When assembling, trim the white margins from each page before taping. For borderless prints, check if your printer supports borderless printing in its settings. If you struggle to align pages cleanly after printing, see our guide on assembling tiled prints with perfect alignment.
Is my image uploaded to the internet?
No. PrintTiler processes everything locally on your Mac. Your images never leave your computer.